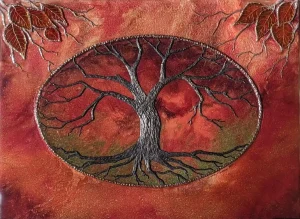


Faux Stained Glass
This Tree of Life was created on an 18" x 24" sheet of glass. The background is ArtResin and mica. The rest of the detailing is Apoxie Sculpt highlighted with mica.

Playtime - Carving
Playtime is a basswood carving. It was created to be the center panel for a hall door. Check back to see the finished door.

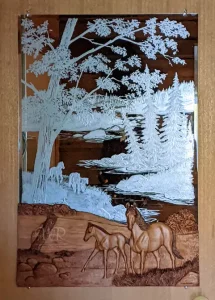
Wood Carving and Etched Mirror
This mixed media (wood carving and etched mirror) was created to be the feature for a hall door.